Making Your Own Homemade Air Conditioner at a Fraction of the Cost
Necessity is the mother of invention. This statement holds true not only in complex scientific operations and inventions but also in the simple DIY projects like homemade conditioners. Even you have been through the sweltering heat of summer either due to a failed AC or poorly performing unit, you must be aware of how difficult and uncomfortable such moments are. Because of the unpredictable weather patterns and probably the effects of global warming, summers tend to be extremely hot than usual.
In order to survive such seasons, you need an alternative way to cool your indoor environment. Homemade air conditioners can as well help in relieving the conventional AC units so that they can last longer.
Why Make Your Own Homemade Air Conditioner
The cost at which conventional air conditioners are selling at presently is in the tune of hundreds or thousands of dollars. This can be expensive especially for homeowners who can barely make it through the month without debt. This option is therefore excellent even for low income earners.
Not every time your air conditioning unit will operate smoothly. Other times it may breakdown especially at the middle of the night. Before HVAC contractors get into your residence, you can switch on your homemade air conditioner to keep you going through the hours.
How to Construct Your Own AC Unit
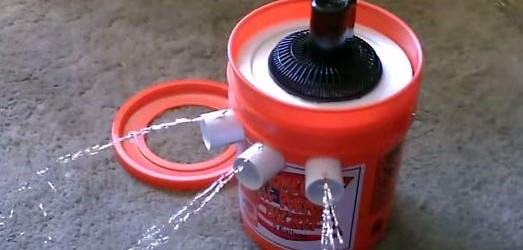
In light with the reasons above and many others that may be specific to certain households, it is beneficial to make your own air conditioner. The basic model on which homemade air conditioners work is that they use the power of evaporative cooling as well as a fan to bring down your room temperature. For convenience, you can use ice water which is stored in a cooler and then cycled through a copper loop positioned in front of a box fan. You can customize and modify the design of the cooler to suit your specific needs.
To start you off, you need the following components:
- A Fan- Preferably a box fan
- A cooler -Which can be a Styrofoam cooler or any that is convenient for you
- An aquarium or pond pump with a higher Gallons Per Hour rating to push the water to the required height so as to reach your coil
- Copper coil tubing
- Vinyl tubing
- Fittings and reducers to connect your vinyl tubing to the copper coil and finally to the pump
- Wood for box fan outriggers
- Zip ties to use in attaching the tubing to your fan
The Assembling Process
Lay out the copper tubing and put your fittings in place. if the copper tubing is already coiled, you will have an easy time while bending it into a spiral. Ensure that you give enough room between each circle when coiling the tubing so as to increases the surface area.
Then attach the fittings to the coiled copper tubing. At times, you may need to solder the joints between the fittings and the copper tubing. However, there are some solderless compression type fittings that you can go for so as to avoid the soldering process.
In case you have to solder, you can start by sanding the copper tubing and reaming the fittings. Then apply solder flux to the outside of the tubing as well as the inside of the fitting. Proceed to heat the fittings with a torch until it is hot enough to melt the solder. Thereafter apply the solder. You can repeat this process for the other end of the copper tubing.
When the fittings are in place you can screw in the barbed adapters for your vinyl hose after you have applied Teflon tape to the threads. Slip the vinyl tubing over the barbs and add two screw-type clamps. If your pump has a special adapter, insert it into the vinyl tubing and thereafter use a screw clamp to secure the copper tubing.
Testing for Leakages
To test your setup for any leaks, fill the cooler with water, immerse the pump and then connect the tubing to your pump. The other tubing should be run back to the cooler. You can now fire it up and see whether it works as expected.
Attaching Copper Tubing to Fan Screen
Do a simple plan to designate the areas where your tubing will enter and leave the setup. Then attach the fan screen with zip ties and fine tune the coiling. After this is done, make 3 holes; one for the outlet, one for the inlet to the copper tubing and the other for the pump power cord. The unit is now ready for a test run.
Operating the Air Conditioner
Put the cooler and fan in place and cable the tubing appropriately. For a condensation pan, you can just put an ordinary pan underneath the fan so as to hold the condensation from coil. The cooler should be filled with enough water to cover the pump and then put in the ice. You can now turn on the pump and gradually adjust the fan speed.
There you go! Your homemade air conditioner is operational and you can comfortably bask in the coolness of your own creation.
Info Provided By:
Boca Raton AC Repair
1489 W Palmetto Park Rd Suite 300H 33486
561-299-5296